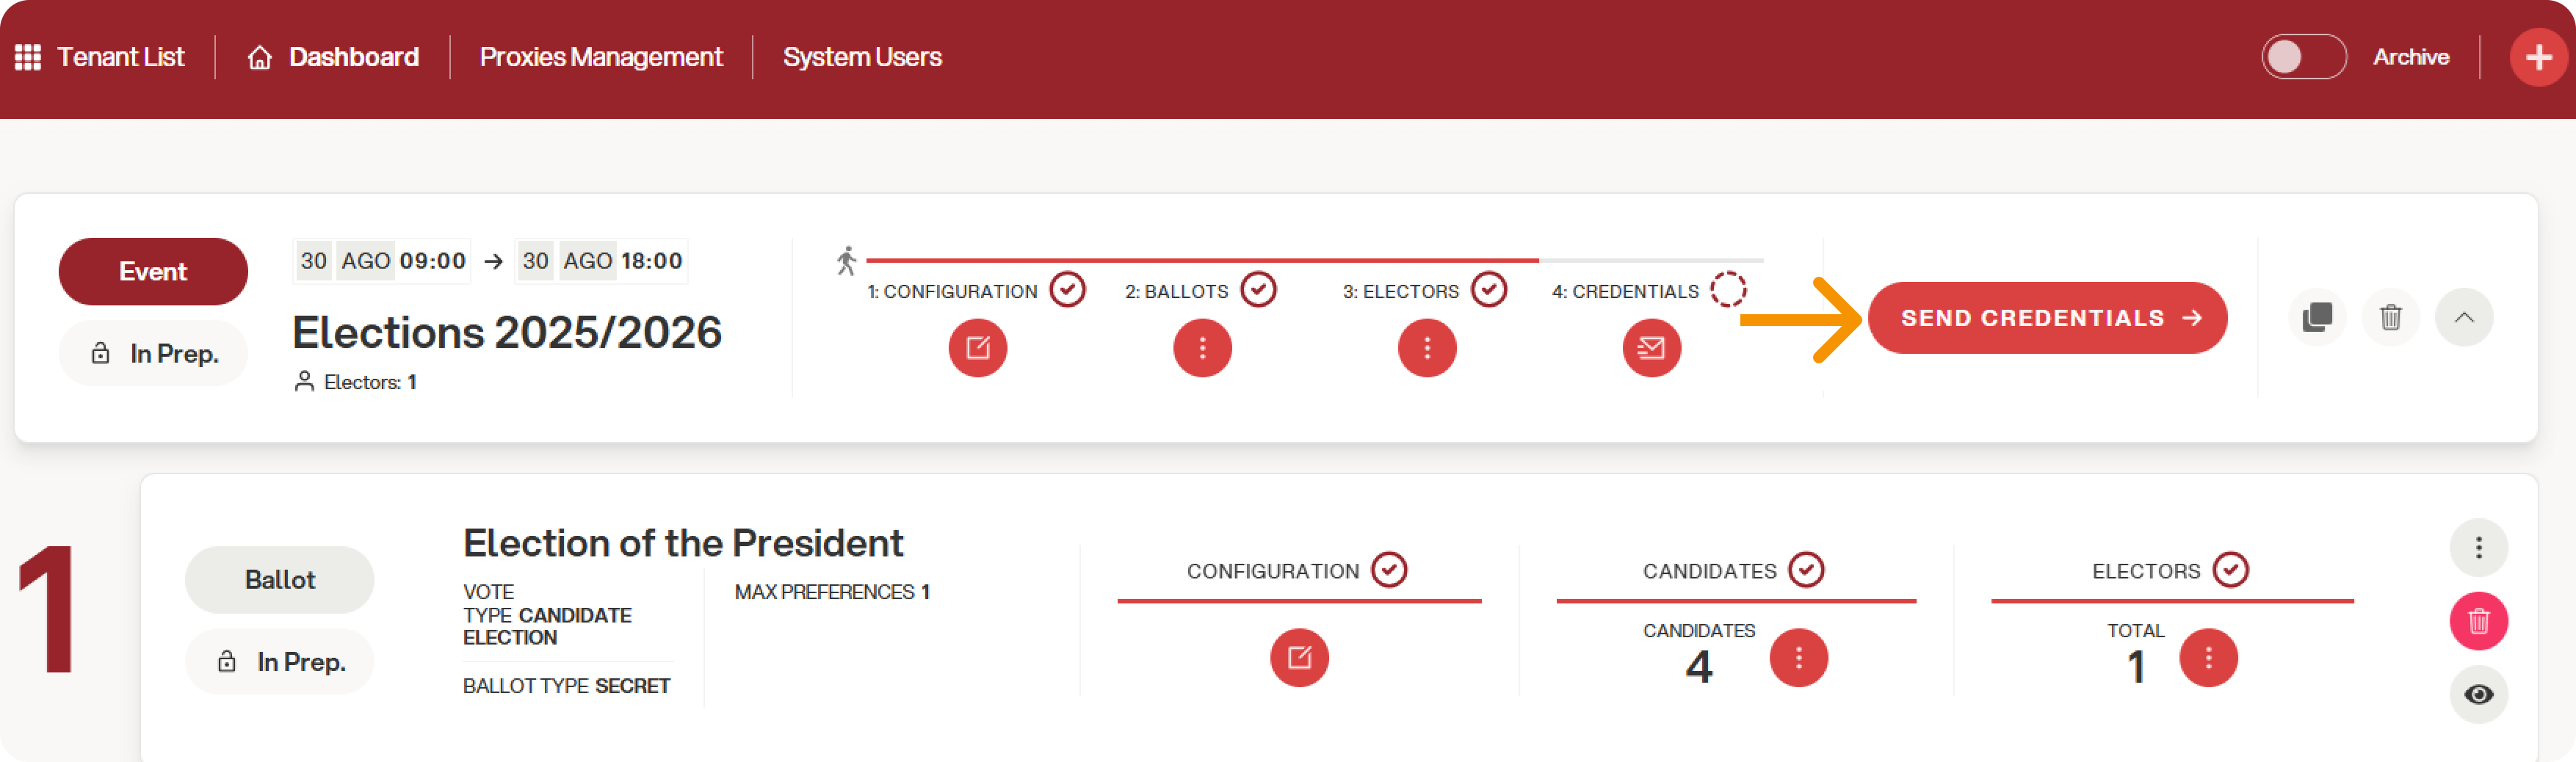
After completing the configuration of an election event, the final step before opening is the validation of the electoral event, which generally coincides with sending the voting credentials, as explained in detail in this article.
To validate the event, simply click the "Send Credentials" button:
A confirmation screen will appear:
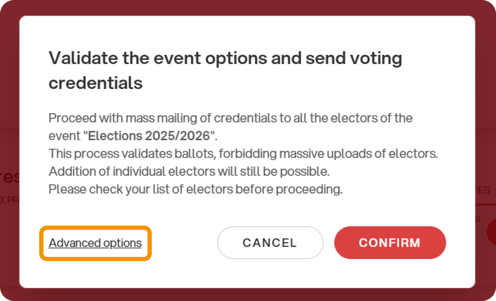
By clicking the "Confirm" button on the right, the credentials (or direct access link, depending on your area's settings) will be sent.
Clicking "Advanced Options" will open a screen that allows you to customize the event validation and/or credential sending based on your needs.
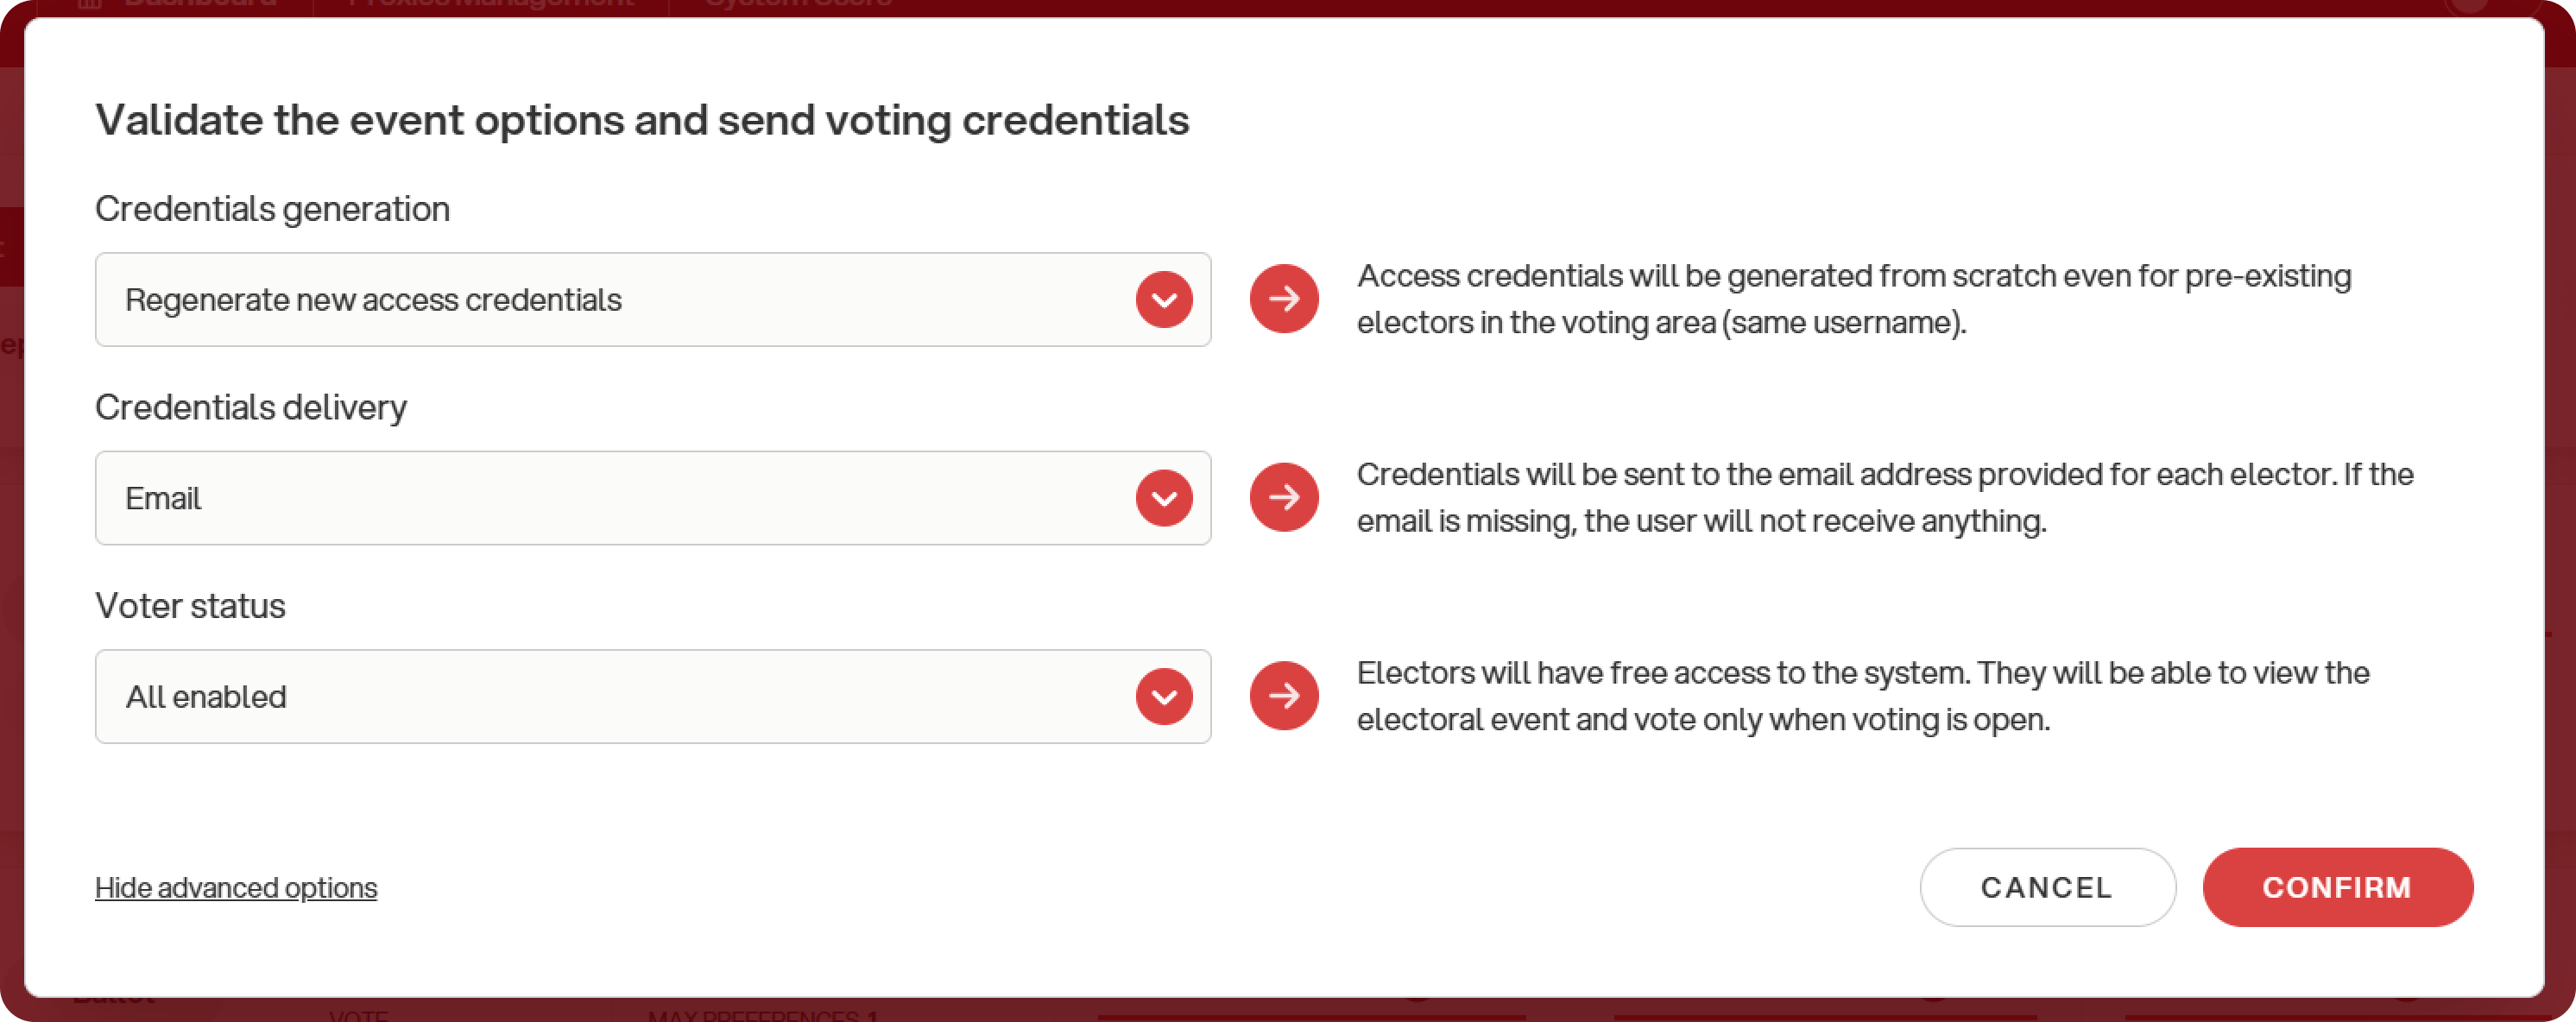
Let's look at the individual steps in detail:
Credential generation
This function is useful if events have already taken place in the same voting area, allowing you to choose whether to generate new credentials or allow voting with previously received ones.
There are two options:
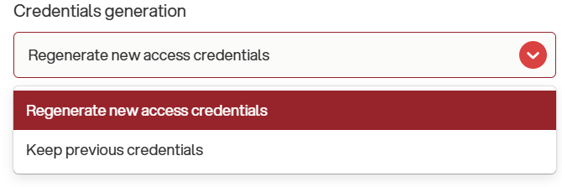
-
Regenerate new access credentials: Access credentials will be generated from scratch for all voters in that election event, even for those already present in the electoral area (same username). In this case, if they have previously used other credentials, these will be invalidated, and they will only be able to access with the latest ones received.
-
Keep previous credentials: The credentials of users already in the system with the same username will remain valid, and no new ones will be sent. For new users, credentials will be generated from scratch.
Credentials delivery
This function allows you to choose whether to send credentials or to validate the event without sending credentials.
There are two options:

-
Email: Credentials will be sent to the email address on file for each voter. If the email is missing, the user will not receive anything.
-
Send nothing: The system will validate the event without sending anything to the voters. If this option is selected, it will no longer be possible to send credentials in bulk for that event.
Voter status
This function allows you to mass disable voters after validation. This can be particularly useful, for example, for events where only those present can cast a vote.
Again, there are two options:
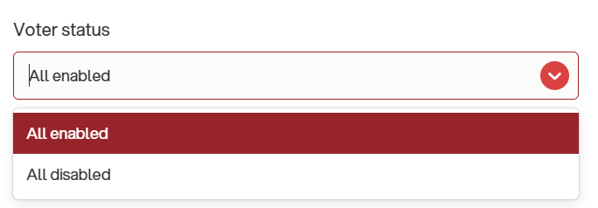
-
All enabled: You can leave this option as default if there's no need to disable anyone. In this case, all voters will be able to access the vote freely after opening.
-
All disabled: Voters will see a message indicating that the user is disabled. Access requires manual enabling by an administrator or an accreditor.
Note: The "All enabled" option does not enable previously disabled users; they will still need to be enabled per event, as explained in this article.